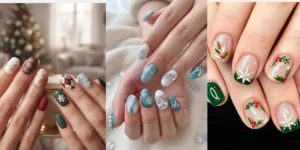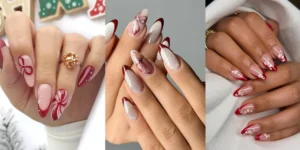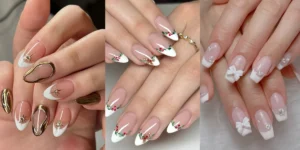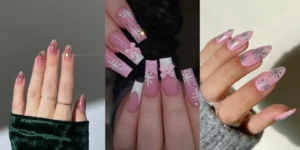
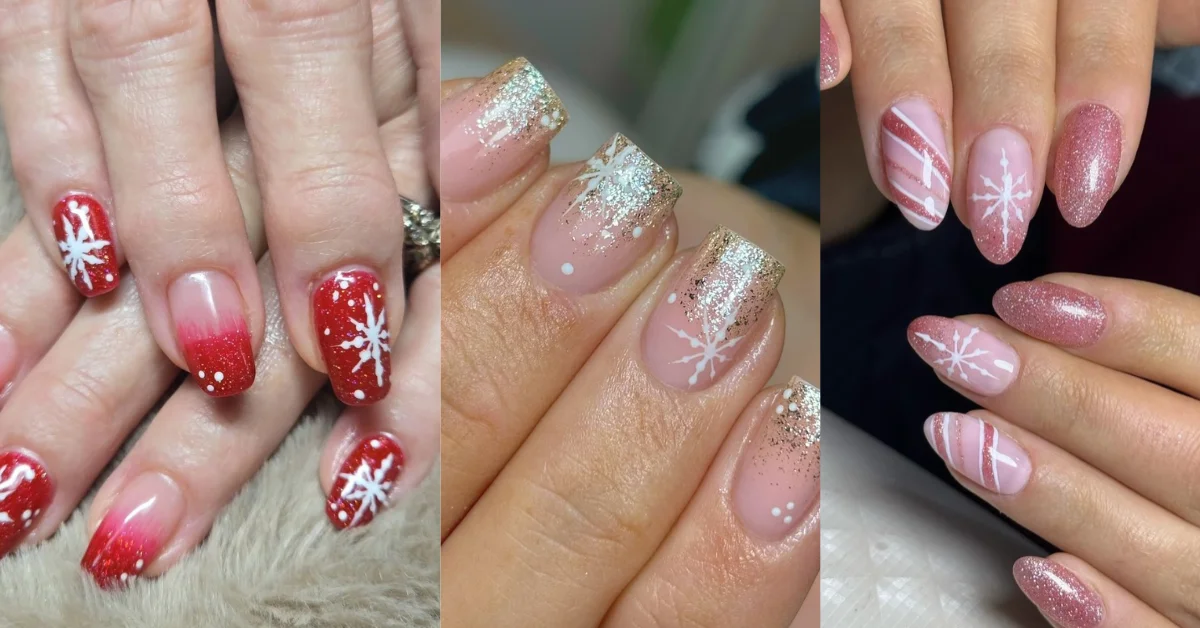
Christmas glitter ombre nail designs are perfect for the festive season. These looks use glitter that gently fades from the tips or cuticles into a sheer or solid base, creating a sparkling effect. In this article, you’ll find 18 Christmas glitter ombre nail ideas in classic holiday colors like red, burgundy, gold, silver, white, and green.
There are also tips on nail shapes and color pairings, a simple DIY to try, and advice on choosing between gel, acrylic, or press-on nails.
What Are Christmas Glitter Ombre Nails?
Christmas glitter ombre nail designs feature glitter that fades softly from the tips or cuticles into a sheer or colored base. The result is festive sparkle without a harsh line.
Why This Nail Style Works
A Longer Look
The gradual fade creates an elegant effect that can make short nails look longer.
Easy Grow-Out
The blended design makes regrowth less obvious than a solid glitter edge.
Christmas Glitter Ombre Colour Guide
Choose a festive base colour and matching glitter for your perfect Christmas manicure.
| Base Colour | Glitter | Look | Best For |
|---|---|---|---|
| Cherry Red | Gold | Warm sparkle | Parties, warm tones |
| Deep Burgundy | Silver | Frosty shine | Evenings, cool tones |
| Sheer Nude | Red | Soft and festive | Beginners, short nails |
| Blush Pink | Champagne or rose gold | Soft shimmer | Daily wear, office |
| Milky White | Silver or iridescent | Fresh snowfall | Winter looks |
| Icy Blue | Silver-white | Frozen sparkle | Cool, icy styles |
| Emerald Green | Gold | Rich, festive shine | Bold Christmas nails |
| Black | Holographic silver | Dramatic sparkle | Parties, New Year’s Eve |
Check out 18 Christmas glitter ombre nail designs, all shown with photos from the salon.
1. Classic Red to Gold Glitter Ombre
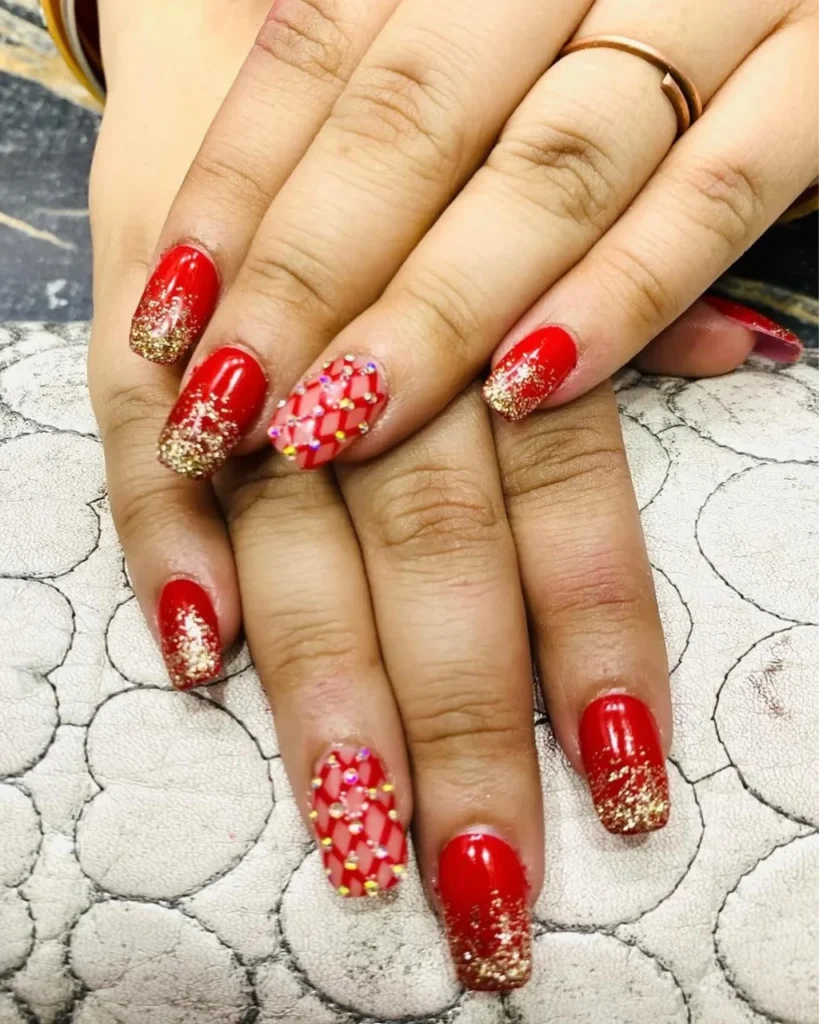
This classic Christmas glitter ombre features a bright cherry red base that gently blends into a dense gold glitter at the tips on most of the nails.
The smooth, warm fade gives the sparkle a rich look instead of a chunky one.
Tip: Apply gold glitter in two thin sponge passes for a smooth, gradual fade.
Pair with: A black or cream dress and gold jewellery.
2. Deep Burgundy to Silver Glitter Ombre
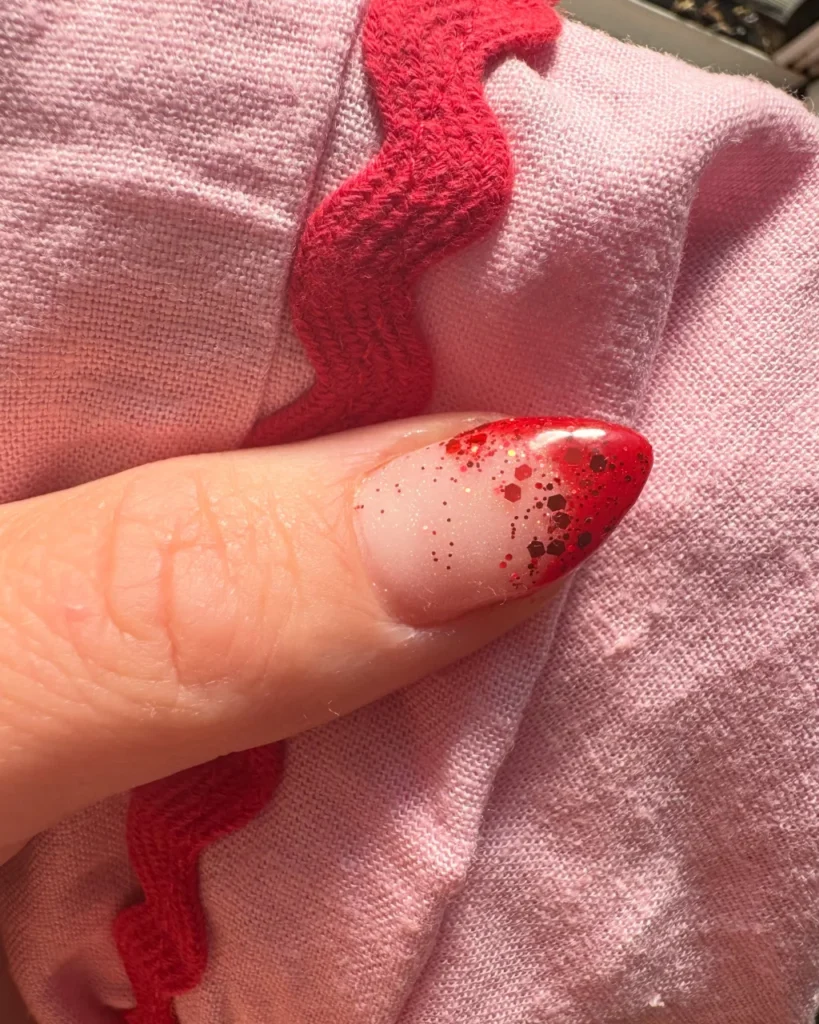
This look features a rich, deep burgundy red base with silver glitter ombre at the tips, offering a moodier, frostier take on the classic red and gold.
The silver fade shines in the light like frost on a dark berry, making it perfect for evening wear.
Tip: Use fine silver glitter for a smooth fade that lets the burgundy base shine through.
Pair with: Burgundy or black outfits and silver jewellery.
3. Nude to Red Glitter Ombre
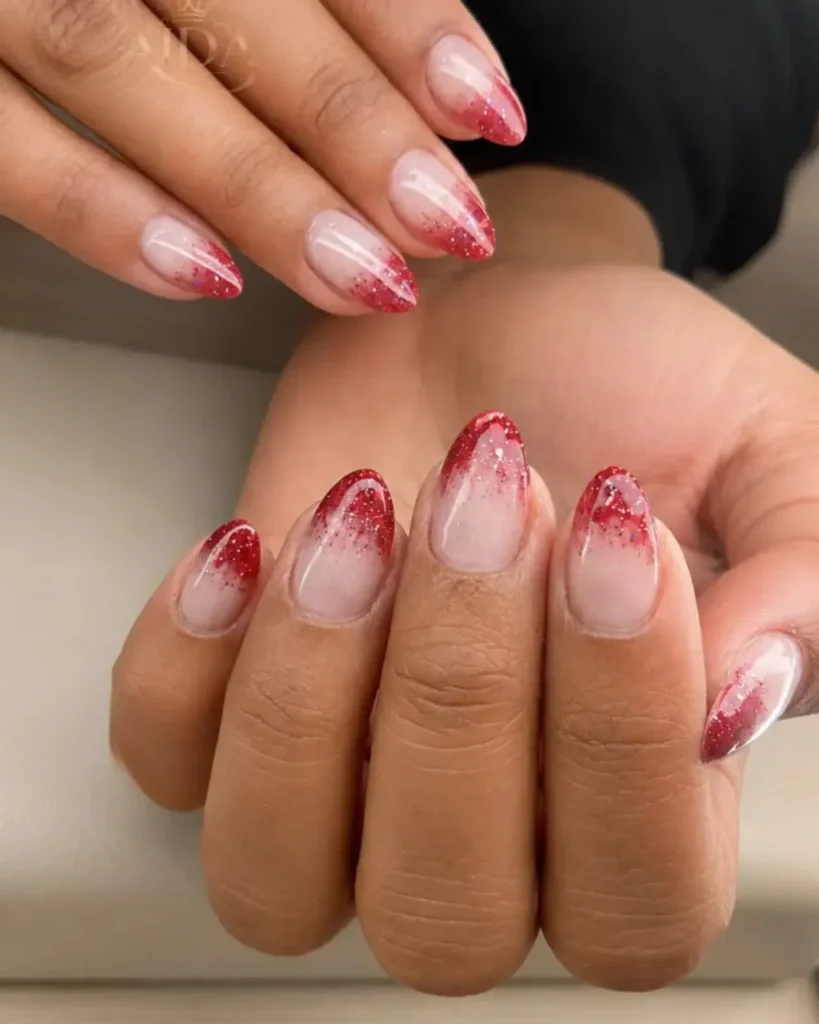
Begin with a nude or clear base, then apply red glitter in a gradient, concentrating the glitter at the tip. This style, called ‘Christmas glitter sprinkles’ is shown on almond nails, but you can easily adjust it for short nails by using less glitter at the tip.
Tip: Keep glitter in the top third of the nail for a soft sprinkle effect.
Pair with: Casual outfits, cosy knitwear, office looks and party dresses.
4. Red Glitter Ombre with White Snowflakes
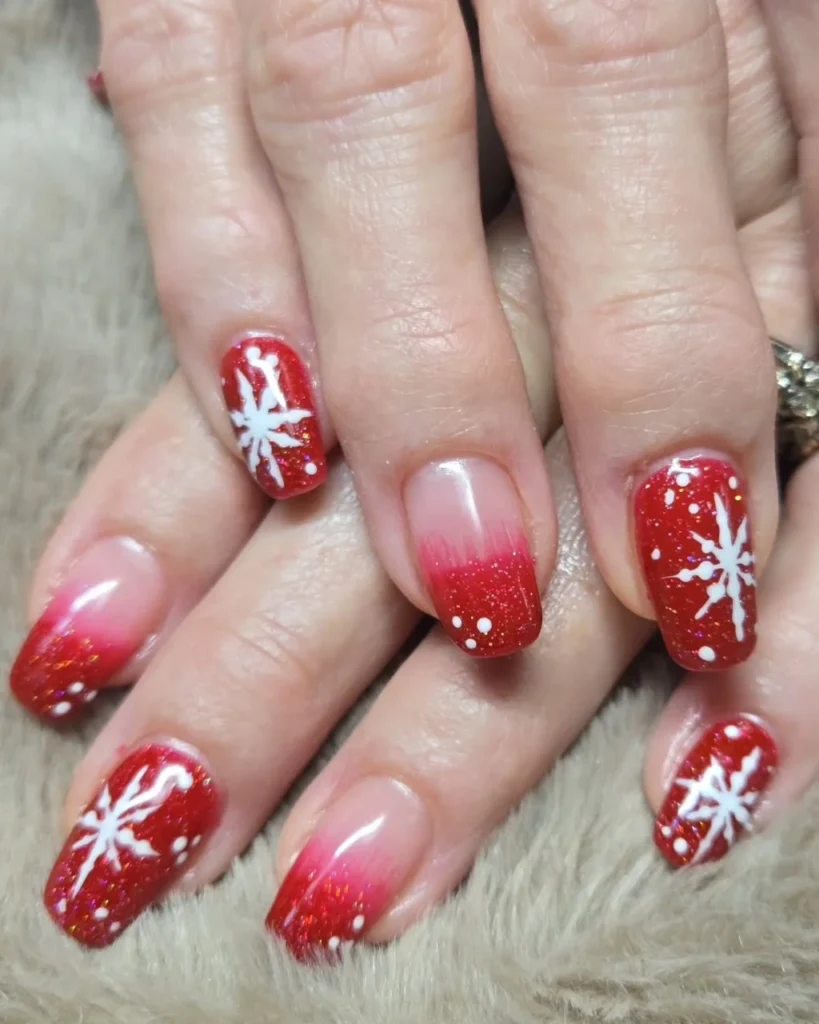
Red glitter covers the tips and softly blends into a natural pink-nude base. Hand-painted white snowflakes and dots decorate the red, giving you both a glitter fade and snowflake art in one set.
The design stays festive without looking too busy.
Tip: Paint snowflakes on fully dry glitter, then seal with a top coat to keep the design crisp.
Pair with: Cream sweaters and red scarves.
5. Champagne Gold Glitter Ombre on Sheer Nude
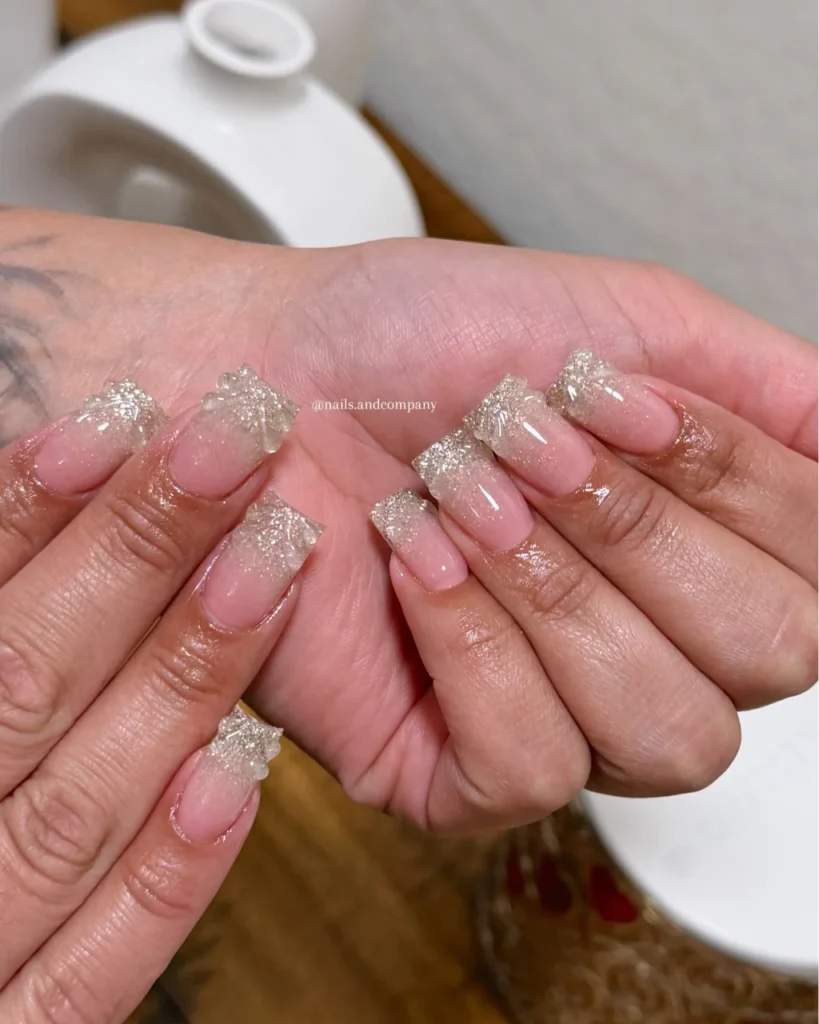
This style begins with a sheer pink-nude base that gradually blends into rich champagne-gold glitter at the tips. The original post highlights the ombre effect, and it’s the most popular and easy-to-wear design in this guide.
It shines like a champagne flute and goes with any outfit.
Tip: Apply two light passes of champagne glitter over a sheer base for a soft, elegant glow.
Pair with: Any outfit, day or night.
6. Rose Gold Glitter Ombre on Blush Pink
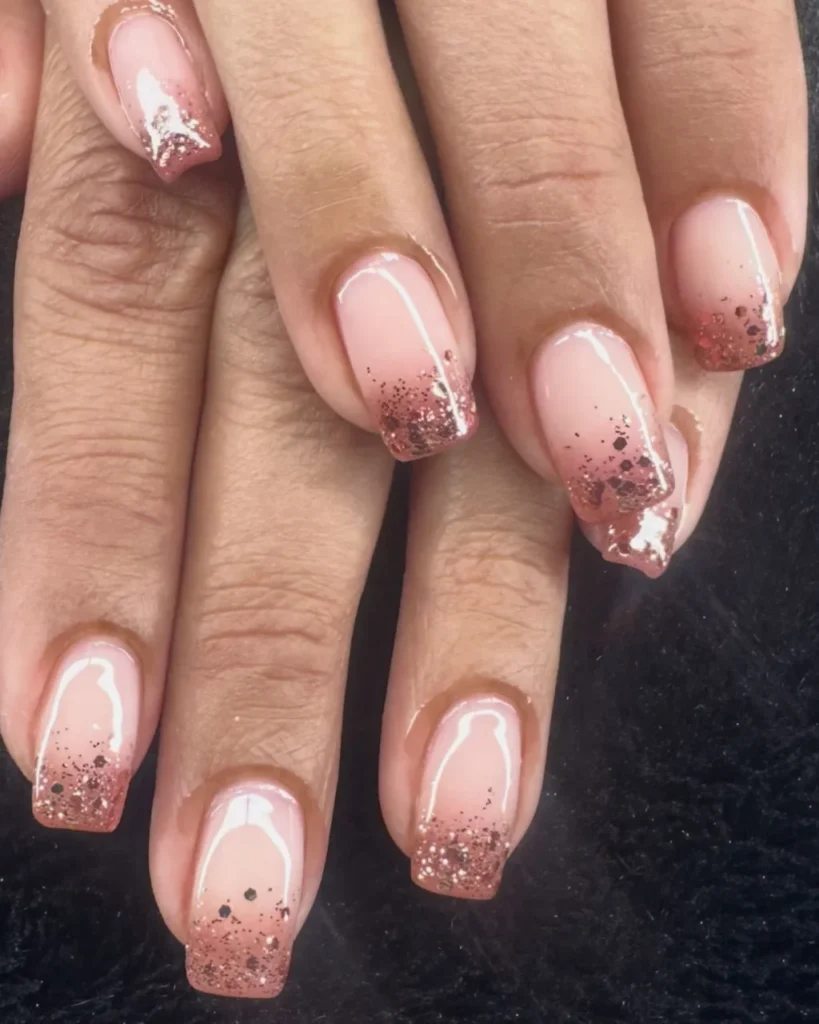
This look starts with a glossy nude pink base that gradually blends into rose gold glitter at the tips, shown here on a short square shape. The fade works beautifully on natural, everyday nail lengths.
Rose gold is the softest metallic in the Christmas collection, giving the whole set a romantic feel instead of a flashy one.
Tip: Keep glitter concentrated at the tips to make short nails look longer.
Pair with: Blush or cream outfits and rose-gold jewellery.
7. Gold-to-Red Reverse Ombre
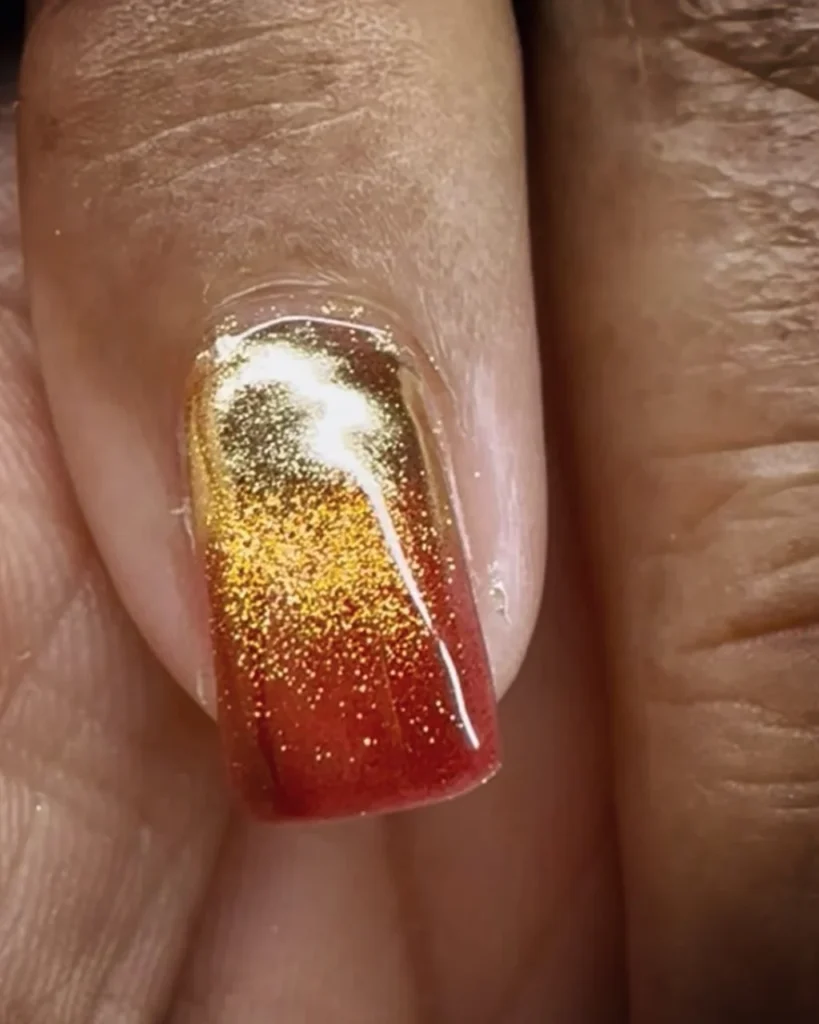
This reverse ombre starts with the shiny gold glitter right at the cuticles and moves into deep red tips. The gold really pops when you hold it up to a glass or a present.
Works best on medium to long almond or coffin shaped nails.
Pair with: A red or black dress and a gold clutch.
8. Sheer Pink Glitter Ombre with White Snowflakes
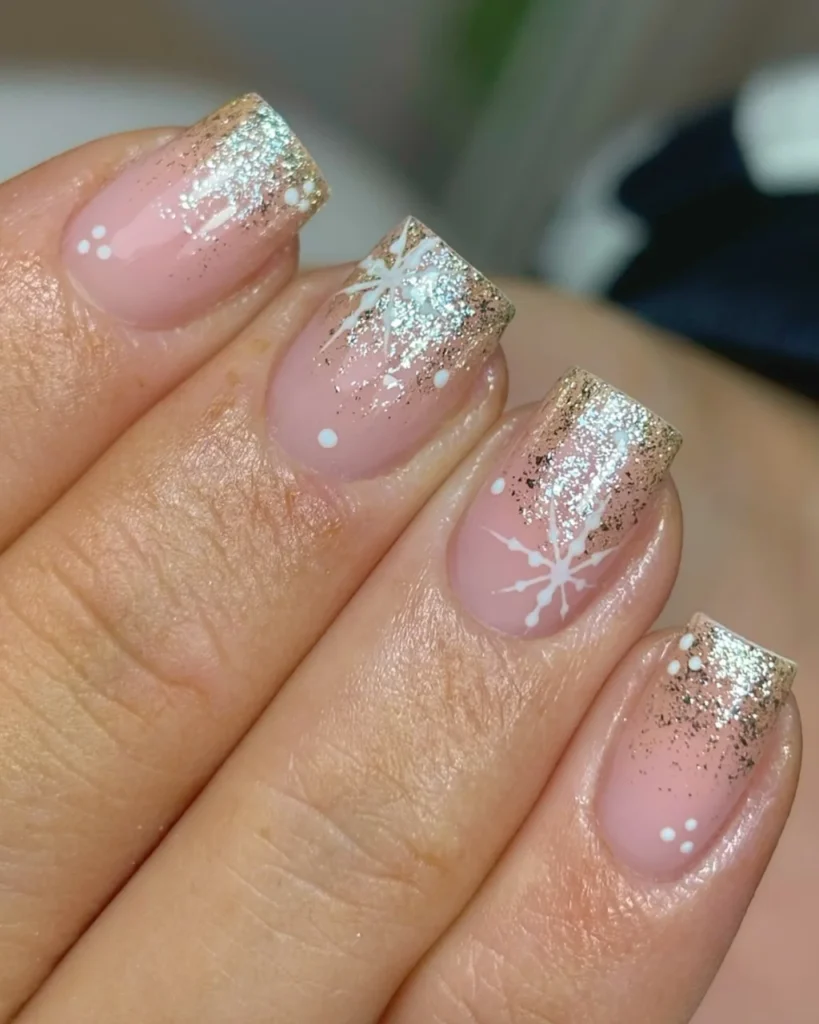
Sheer pink base with silver and gold glitter fading to the tips. Small white snowflakes on the middle and ring fingers gives it a very soft, very subtle Christmas feel. Best on short to medium almond or oval nails.
Pair with: Pink or white knits.
9. Silver Frost Ombre on Milky White
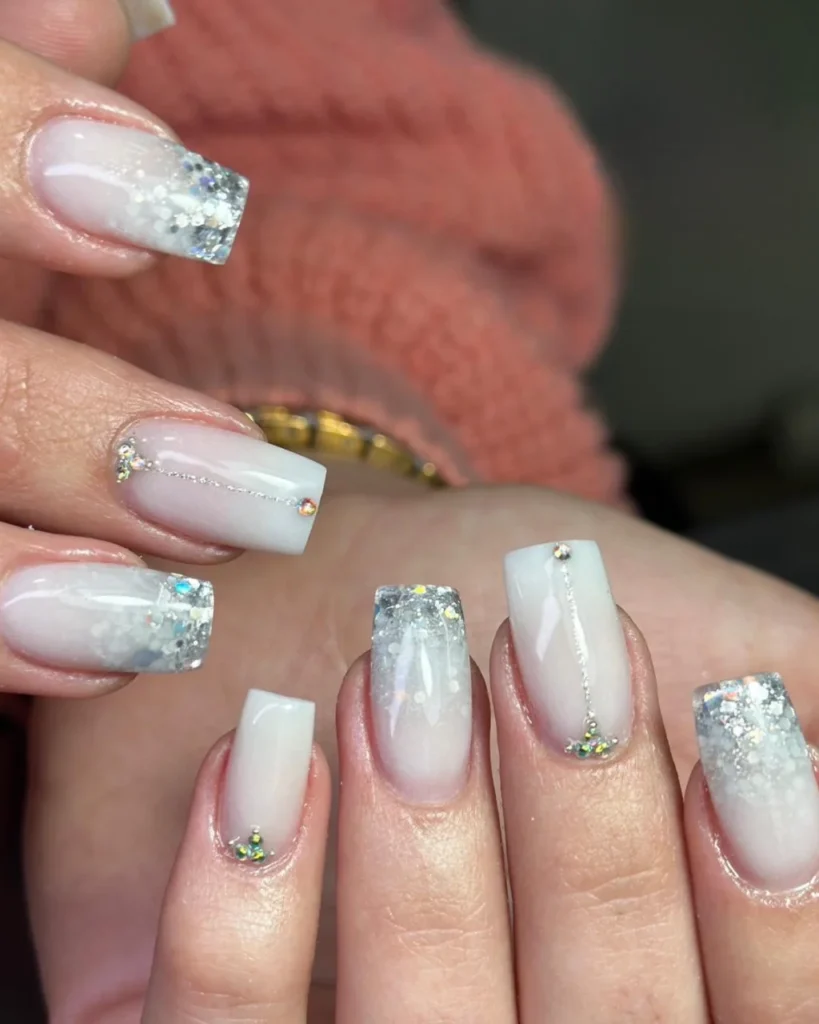
This has a milky white base which then fades into silver glitter tips. There are some small rhinestones and fine lines to give it a very frosty effect, like ice on a window. It’s one of the very best Christmas glitter ombre designs if you’re after a snowy finish.
Works really well on medium to long almond or square nails.
Pair with: White or silver outfits and winter wedding looks.
10. Icy Blue Glitter Ombre
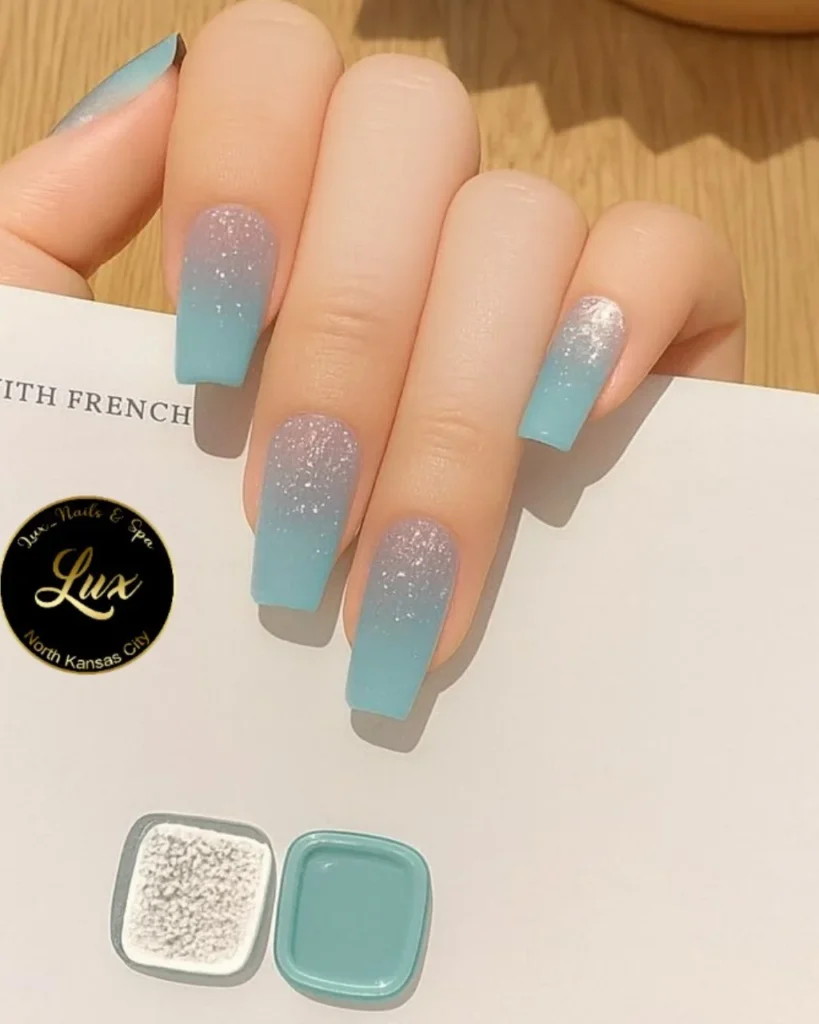
This icy blue ombre goes from pastel turquoise tips to a clear base right at the cuticles. There’s a good amount of silver white glitter too which gives it a very frosty, sparkling effect (like a frozen lake).
It’s a pretty fresh option for Christmas if you’re after something other than red and gold. Works best on medium length almond or oval nails.
Pair with: Grey or white outfits and silver jewellery.
11. White Glitter Snow Globe Ombre
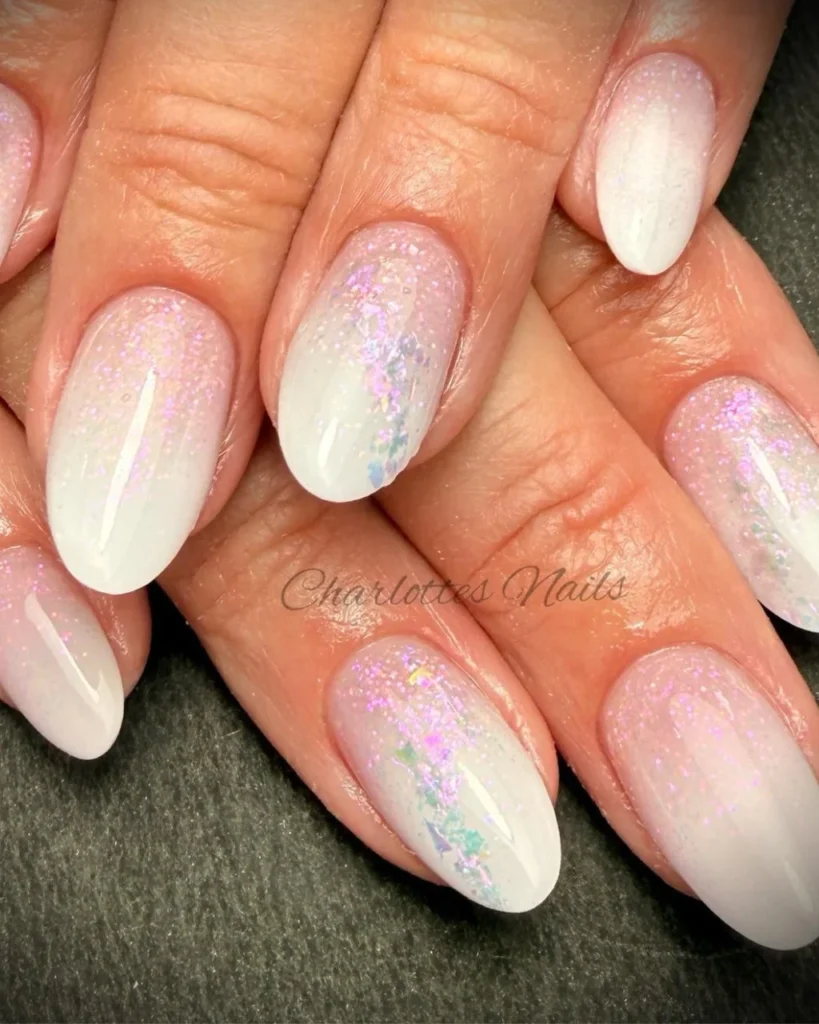
This has white tips which fade into a sheer pinkish nude base. There’s a good amount of fine glitter and some larger flakes in pink, purple and blue to create a snow globe effect as the colours catch the light.
Works best on medium to long almond nails.
Pair with: White or pastel outfits and pearl jewellery.
12. Silver Glitter French Ombre
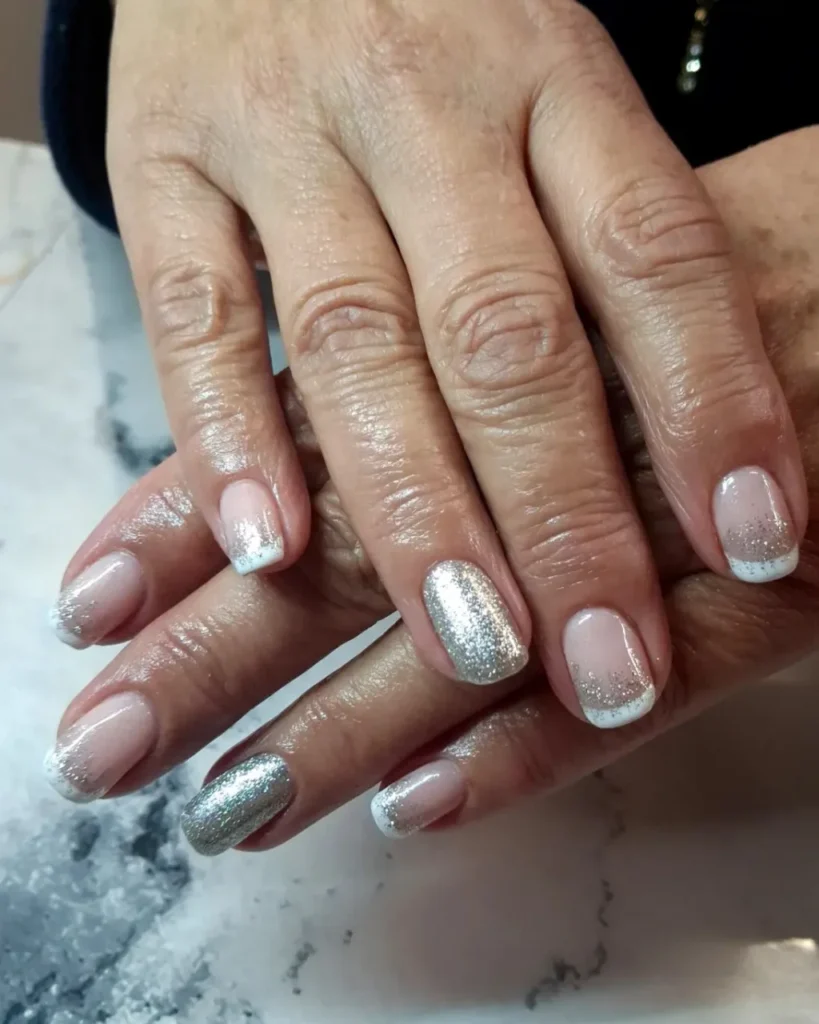
This is a classic French tip with a silver glitter finish. The base is a glossy nude pink with white tips which fade into silver glitter. The ring fingers are fully glittered.
It’s a very elegant design and is ideal for formal occasions, works particularly well on short to medium almond or squoval nails.
Pair with: Formal dresses.
13. Emerald Green Reverse Glitter Ombre
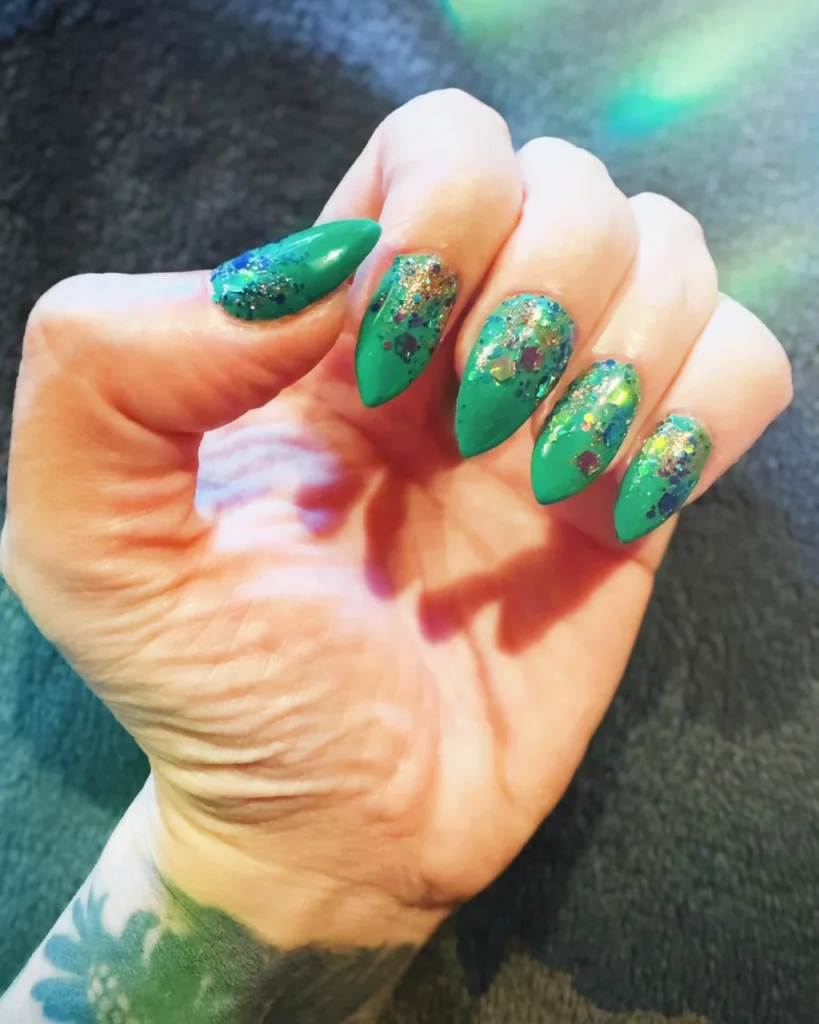
Deep emerald green nails with gold glitter and a touch of blue, purple and yellow sparkle right at the cuticles. The glitter fades towards the tips so it’s a very festive look, like Christmas lights shining through a tree.
Works really well on medium to long almond or stiletto nails.
Pair with: Black or gold outfits and emerald dresses.
14. Forest Green to Gold Glitter Ombre
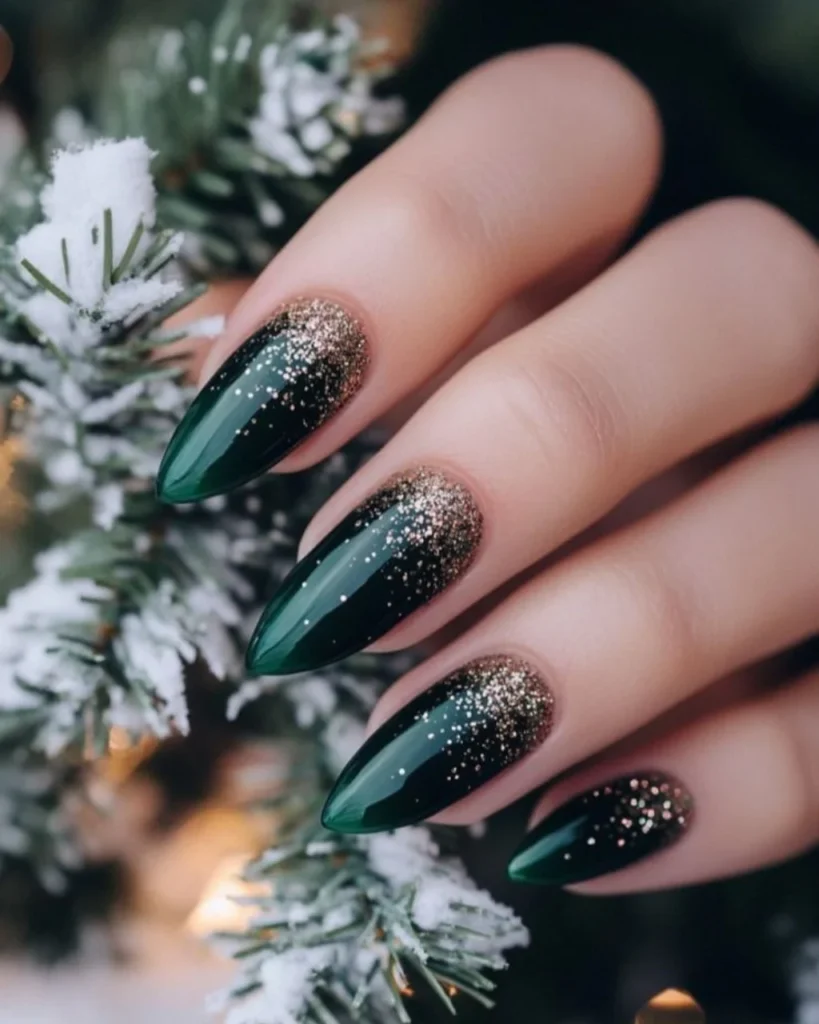
This is a glossy dark green with a gold glitter at the tips. The green and gold is quite festive, quite elegant and quite luxurious without being over the top.
Works really well on medium to long almond or coffin shapes.
Pair with: Black, cream or camel outfits and gold accessories.
15. Mint Frost Ombre with Silver Glitter
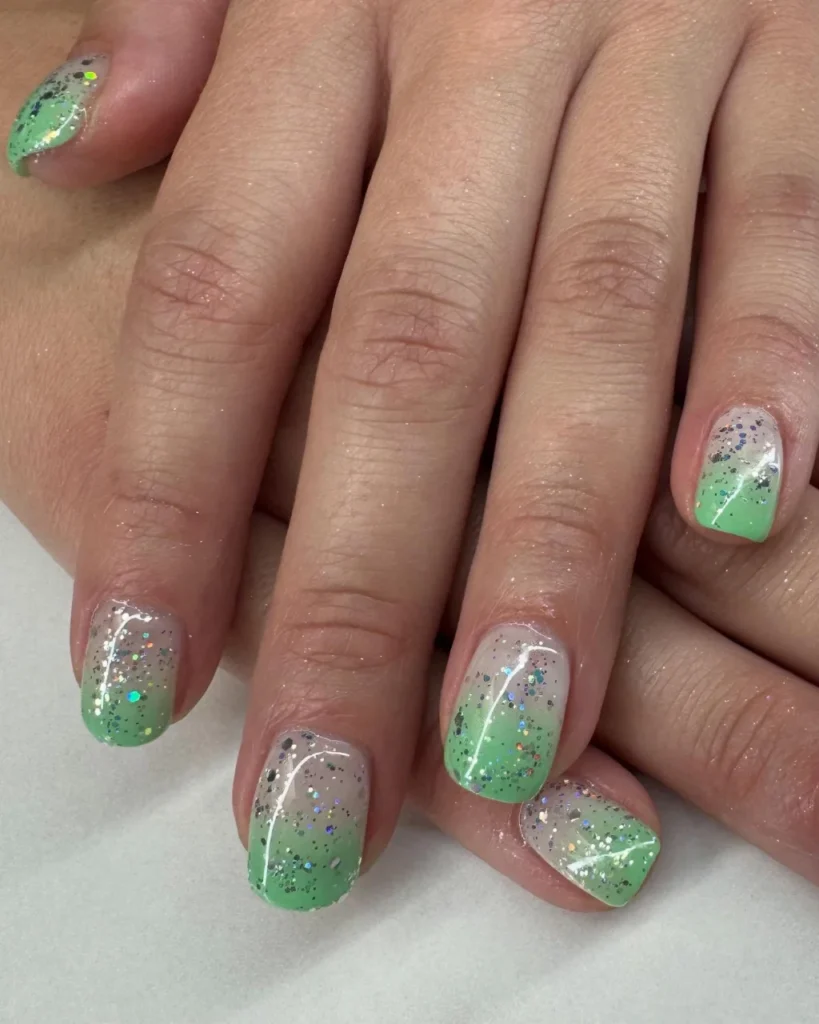
This one has mint green tips which fade into a clear nude base. A touch of silver and iridescent glitter gives it a soft frosty sheen. It’s a very fresh, light look and is ideal for the day.
Works best on short square or squoval nails.
Pair with: White or grey outfits and silver jewellery.
16. Pink Glitter Ombre with White Snowflakes
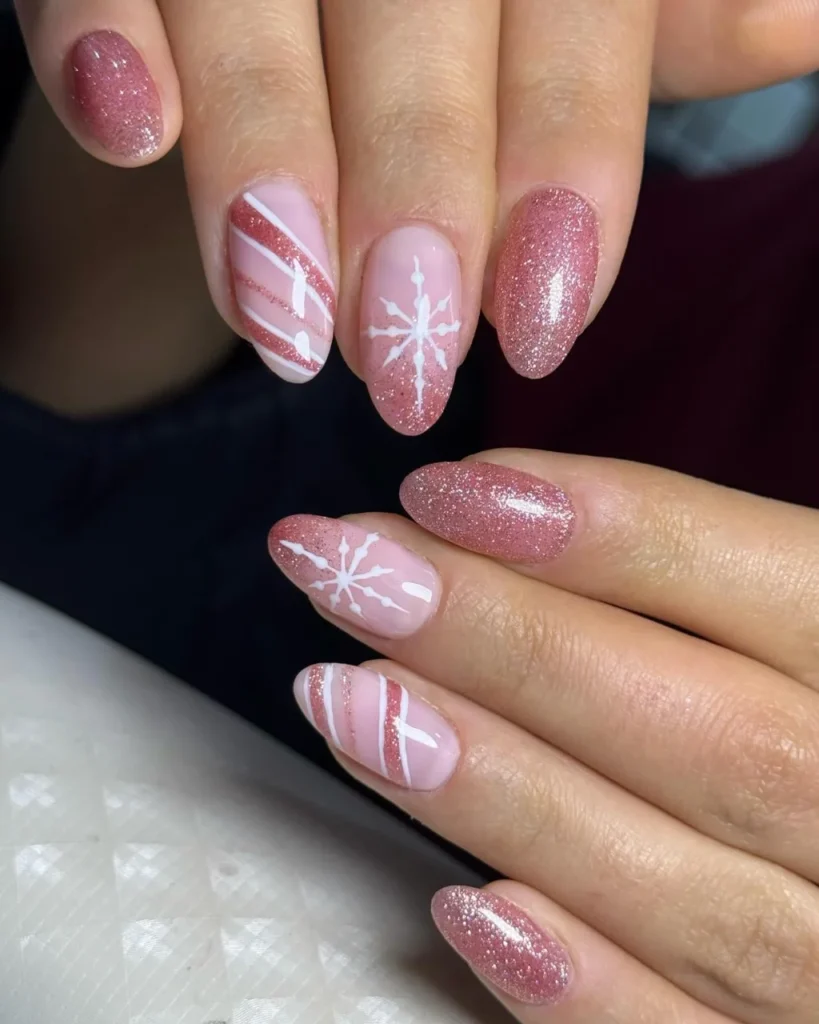
This design has soft pink gradients, white snowflakes and diagonal pink glitter stripes with some very fine white lines. The matching blush colours tie the whole thing together for a very soft Christmas look.
Best on short to medium almond or square nails.
Pair with: Pink or white outfits and cosy knits.
17. Icy Blue to Royal Blue Ombre with Starry Silver Glitter
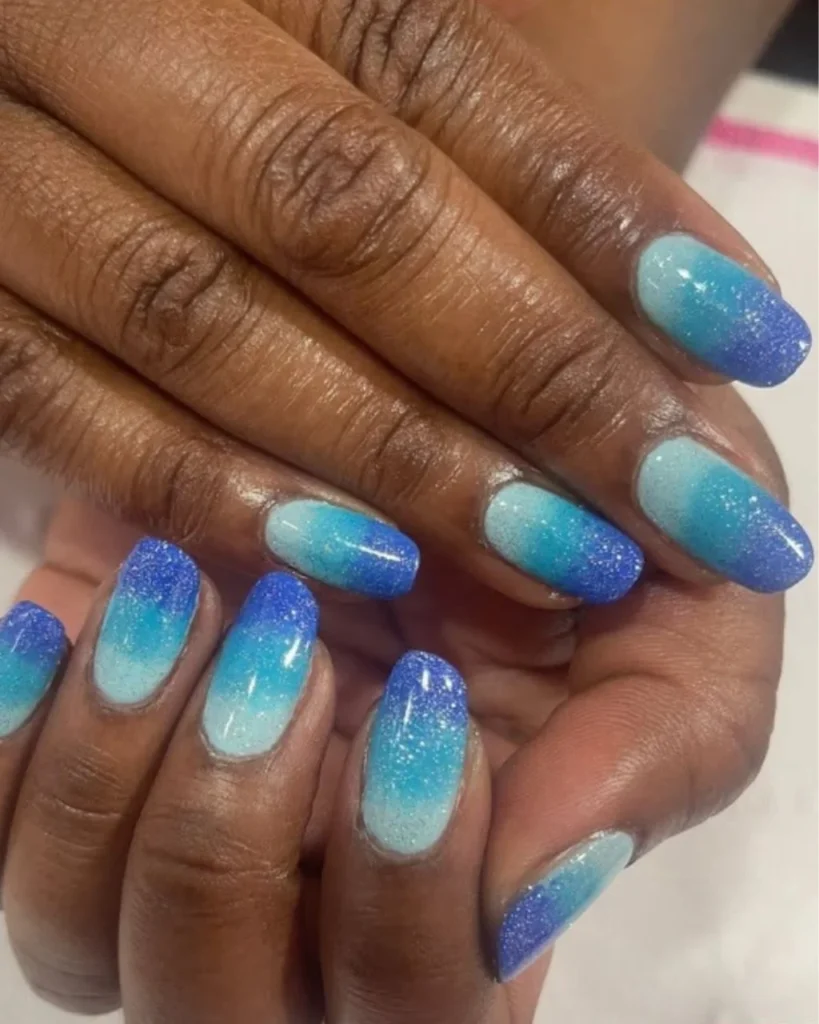
Fades from a pale icy blue near the cuticles to a deep royal blue at the tips. Fine silver glitter throughout gives it a very starry, midnight sky effect.
Best on medium to long almond or oval nails.
Pair with: Navy or silver evening outfits.
18. Black & Holographic Glitter Ombre Accent Set
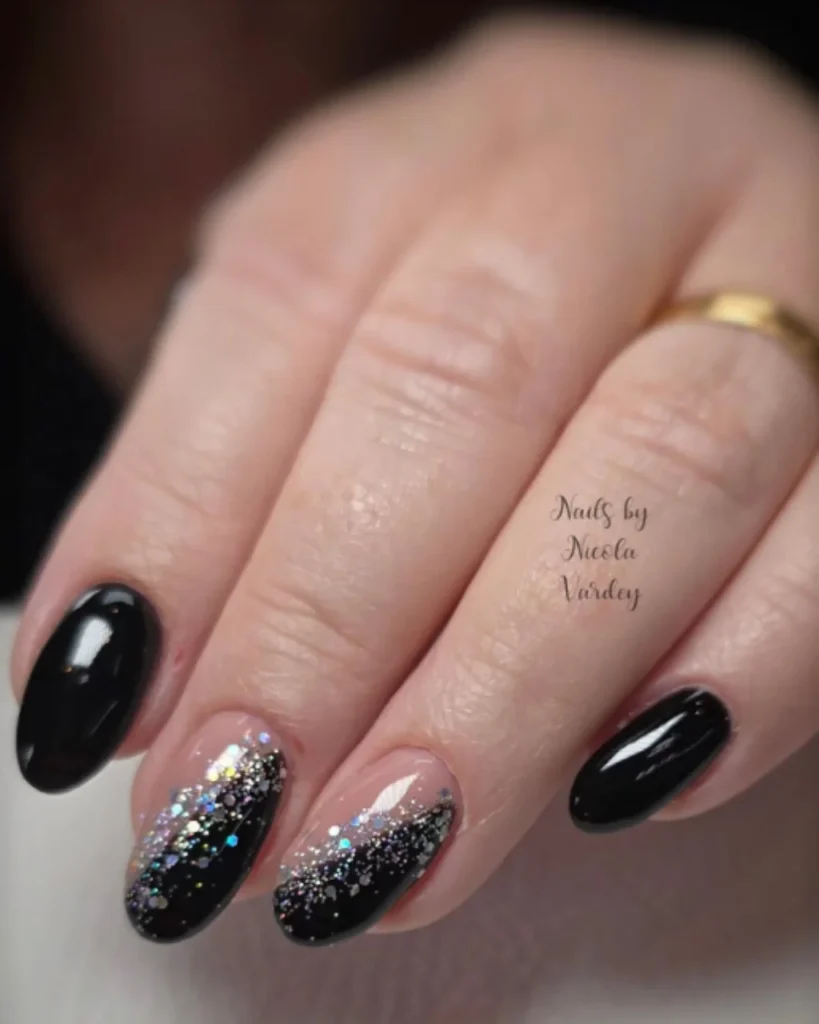
Paint the thumb and pinky with glossy black polish. For the middle and ring fingers, use a nude base, then add a diagonal black fade and finish with a thick layer of silver holographic glitter at the tips.
This look is perfect for Christmas parties or New Year’s Eve, and it really stands out on medium-length almond or square nails.
Pair with: Black dresses and New Year’s Eve outfits.
Best Christmas Glitter Ombre by Nail Shape & Length
| Shape / length | Best ombre style | Avoid |
|---|---|---|
| Short square / squoval | Nude-base fades, fine glitter, and a fade kept in the top third (Ideas 3, 6, 15). | Chunky glitter across the whole nail — it can overwhelm a small nail bed. |
| Almond / oval | Any colour family, with a longer, softer fade and snowflake accents (Ideas 1, 4, 5, 9). | A very dark base paired with very dark glitter without enough contrast — the fade can disappear. |
| Coffin / stiletto | Chunky glitter, two-tone fades, and reverse ombre (Ideas 7, 13). | Delicate fine glitter alone — it can get lost on a larger nail surface. |
Tip: On shorter nails, a concentrated glitter fade keeps the manicure looking balanced. Longer nail shapes can carry bolder sparkle and more detailed designs.
DIY in 5 Steps — The Sponge Method
Prep Your Nails
Shape your nails, gently push back your cuticles, apply a thin base coat, and let it dry fully.
Apply Your Base Colour
Apply two thin coats of your chosen base shade. Let them dry completely, or the glitter can turn muddy instead of sparkling.
Dab on the Glitter
Paint glitter polish onto the tip of a lightly damp makeup sponge. Dab densely at the nail tip, then use a lighter touch as you move down to create a soft fade.
Build the Ombre Fade
Repeat for two or three light passes, allowing each layer to dry as needed, until the fade looks smooth. Adding a second glitter colour? Concentrate it on the very tips.
Seal and Shine
Finish with a smooth, generous layer of gel-effect top coat and cap the free edges to help protect your manicure.
Beginner Rule
Start with glitter polish rather than loose glitter. Fine glitter creates the softest fade, while chunky glitter looks best concentrated at the tips.
Book Smart — Gel, Acrylic or Press-On?
Gel Polish
2–3 weeksOffers a smooth, glossy glitter finish and is a popular choice for the Christmas-to-New-Year period. Soak-off removal applies to soak-off gel systems; follow the product’s removal instructions.
Acrylic Extensions
3+ weeks with maintenanceA great option for the extra length that coffin and stiletto glitter fades need. Professional removal is recommended to help protect your natural nails.
Press-Ons
7–10 daysPerfect for one party or a festive event when you want a beautiful manicure without booking a salon appointment. Choose a ready-made glitter ombre set for an easy finish.
Regular Polish
5–7 daysBest for DIY nail lovers who want to experiment with different Christmas glitter fades. It is the easiest option to remove and redo at home.
What to Say at the Salon
Show your nail technician the inspiration photo and say:
“I’d like this glitter fade with this base colour, glitter densest at the tips, and a glossy top coat.”
The reference photo helps your technician understand the exact colour, glitter placement, and finish you want.
Note: Wear time varies with nail preparation, application, daily activities, and the products used.
3 Mistakes That Kill a Glitter Ombre
1. Applying Chunky Glitter Over the Entire Short Nail
Chunky glitter can overwhelm a short nail and create a bulky finish that may chip more easily. Do this instead: Concentrate the larger glitter pieces at the tip and blend them softly toward the middle.
2. Choosing a Dark Base and Dark Glitter
When both shades are too similar, there is not enough contrast to show off the ombre fade. Do this instead: Pair burgundy with silver glitter or deep green with gold glitter for a more noticeable festive finish.
3. Using a Matte Top Coat Over Fine Glitter
A matte top coat reduces the reflective shine that makes fine glitter sparkle. Do this instead: Choose a glossy top coat for a classic, light-catching Christmas manicure. Use matte only when you deliberately want a softer, velvety effect.
The Golden Rule
Keep chunky glitter concentrated at the tips, choose contrasting colours, and finish with a glossy top coat to make your Christmas glitter ombre stand out.
Make It Last (and Take It Off Right)
Protect Your Manicure
Wear gloves when washing dishes or cleaning to reduce prolonged water exposure and contact with household cleaning products.
Use Cuticle Oil Daily
Apply cuticle oil daily to keep the skin around your nails moisturised and looking neat.
Refresh Your Top Coat
For a regular-polish manicure, apply a fresh compatible top coat around day 3–4 if needed to refresh the shine and help protect the finish.
How to Remove Glitter Polish
Soak a cotton pad with nail polish remover and hold it against each nail for around 30 seconds. Gently wipe away the polish; repeat if needed rather than scrubbing aggressively.
How to Remove Gel Polish
Only soak off gel products that are specifically designed for acetone removal. Follow the manufacturer’s instructions; some systems use acetone-soaked cotton and foil wraps for approximately 10–15 minutes. If the gel does not lift easily, do not force or peel it off. Hard gel and acrylic enhancements generally require professional removal.
Never Peel Off Gel
Peeling or picking off gel can remove layers of your natural nail, leaving it thin, weak, or damaged. Gentle, product-appropriate removal helps protect your nails.
Explore Christmas Nail Designs
Discover classic red French tips, elegant white tips, soft pink Christmas nails, and festive green Christmas French tip nail inspiration.
Red French Tip Christmas Nail Designs
Explore Red French Tip Ideas ↗ TIMELESS FRENCH TIPSWhite French Tip Christmas Nail Designs
Explore White French Tip Ideas ↗ SOFT PINK NAIL INSPIRATIONLight Pink Christmas Nail Designs
Explore Pink Nail Ideas ↗ ELEGANT GREEN NAILSGreen Christmas French Tip Nail Designs
Explore Green French Tip Ideas ↗Conclusion
Christmas glitter ombre nails are a very easy way to give your manicure a festive feel and you don’t need any fiddly nail art skills at all. If you’re after something soft and safe then the champagne gold is a great option as it goes with pretty much anything. For a more classic Christmas look then go for the red and gold.
Save your fave for your next salon visit or at home manicure and let us know in the comments which one you went for.
Frequently Asked Questions
Q1. How much do Christmas glitter ombre nails cost?
Gel manicures usually cost between $45 and $65. Acrylic sets range from $60 to $90, while press-on nails are about $10 to $25. Doing your own nails is usually cheaper.
Q2. How long does a salon appointment take?
A gel manicure takes about 45 minutes. If you want extensions or detailed nail art, expect your appointment to last 60 to 90 minutes.
Q3. Can I get glitter ombre toenails?
Yes, you can. For best results, keep the glitter most concentrated at the tips of your big toes. A pedicure usually lasts about 4 to 6 weeks.
Q4. What if one nail chips?
File the chipped edge smooth, apply your base color and a bit of glitter, then finish with a top coat.
Q5. When should I book my Christmas nails?
Try to book your appointment 2 to 3 weeks in advance to get your preferred time before Christmas.